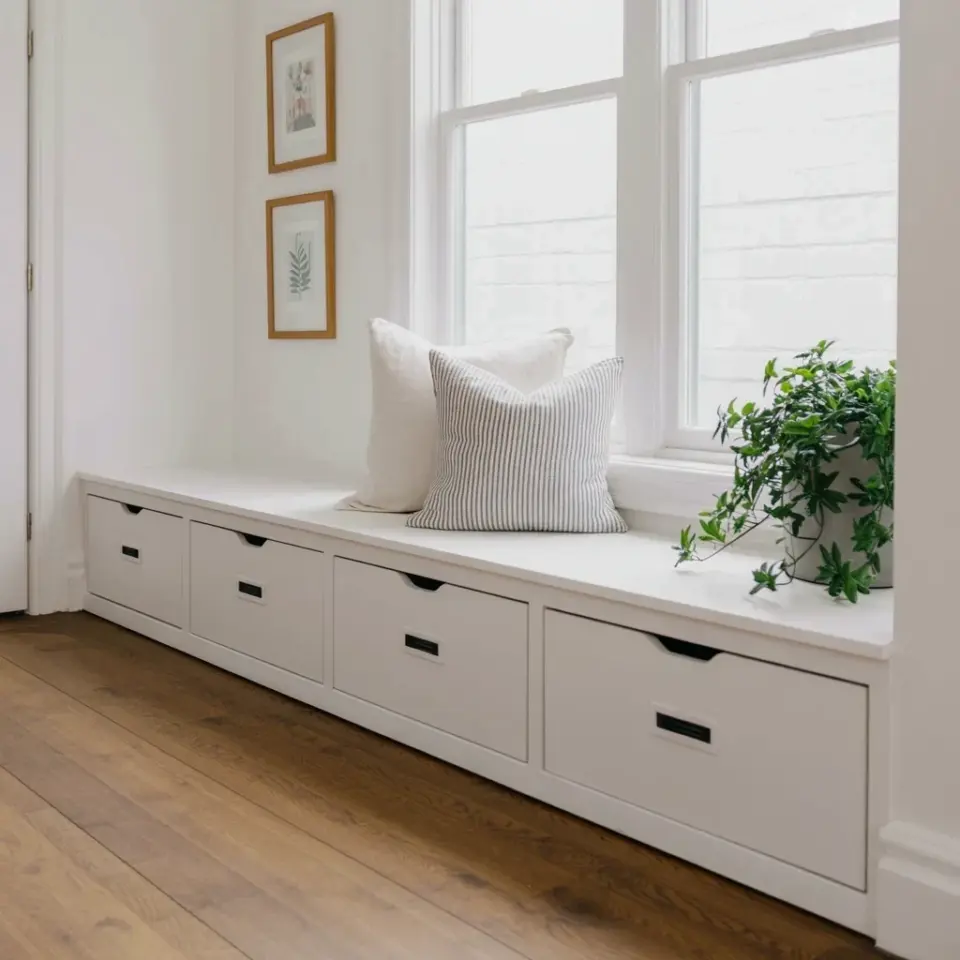
Ok so, you’ve been staring at that empty spot under the window, trying to figure out how to make it useful without hiring a contractor. You want storage, you want a cozy corner, but you absolutely do not want to pay custom woodworking prices. A DIY IKEA window seat with Nordli drawers is the answer, and I promise it’s simpler than you think. This is the hack that turned my boring living room nook into the most-used spot in the house, all for under $300. Best part? You don’t need a million fancy tools.
The Nordli series has basically become a secret weapon in the IKEA hacking community. The drawers are deep, they slide like a dream, and the boxes themselves are lightweight but sturdy. Stack a couple of them, throw a nice piece of wood across the top, and you have instant seating. But it gets better than that. Because you are installing this against a wall, you can skip the finished sides entirely. That saves you from buying extra panels and makes the whole build even cheaper.
—
### The Basic Symmetry and Why It Works
Most window seats look awkward because the proportions are off. You need the seat depth to be generous enough for a cushion, but the height to match a standard chair, usually around 18 to 19 inches. A single Nordli chest is 29 1/8 inches high, which is too tall for sitting. Two stacked on top of each other get you to 58 inches, which is too high for a seat unless you are building a loft. To make this work, you need to lay the pieces horizontally.
Two Nordli chests lying on their sides gives you a perfect base. The depth of the chest becomes your seat height. I stacked two units side by side horizontally. The width of each chest is around 31 inches, so two of them create a 62-inch seat, which is a perfect fit for a standard window. If your window is wider, just add a third unit.
### What You Need to Grab From IKEA
Here is the exact shopping list we used. Your measurements might vary slightly based on your window width, but this is a solid starting point.
– 2x Nordli chests (the 4-drawer versions are the best value)
– A solid wood top (pine or oak board) cut to your desired length, or a countertop from IKEA
– Wood stain or paint for the top
– Screws and a drill for joining the units together
– Sandpaper (medium and fine grit)
– A circular saw or a table saw for cutting the top piece
You will also need a cushion. You can buy one or make one, but we will get to that later. The actual Nordli units can stay white or you can paint them to match your trim.
### The Ratchet Jaw Problem (and My Solution)
Here’s the thing that nobody tells you about hacking Nordli pieces. There is a gap between the drawer units when you place them side by side. Not a huge one, but enough to see the floor through it. It drives me crazy.
To fix it, you need to attach the units together vertically. Clamp them together so the side panels touch. Then, drill pilot holes through the side frame of one unit into the side frame of the other. Use short screws, like the ones that come with the furniture, to pull them flush. Do this at the top and bottom of each corner. This creates a solid, monolithic block. It looks like one continuous piece of furniture instead of two separate boxes that bumped into each other.
### The Chunky Top is Non-Negotiable
This is where you turn a “nightstand stacked on a nightstand” look into a legitimate built-in window seat. The top board is crucial. If you use a thin sheet of veneer or lightweight paneling, the whole thing feels cheap. You need something heavy.
I drove to the lumber yard and picked up a 1-inch thick piece of solid pine. I had them cut it to the exact width of my assembled units, but I left the length a bit longer. I wanted about a 1-inch overhang on each side. That little lip makes it look intentional. You sand it smooth, wipe it clean, and stain it. I used a dark walnut stain to contrast the white Nordli boxes. It adds a bit of sophistication to what is otherwise a very utilitarian piece.
### Molding and Batten, the Secret to the Built-In Look
You can stop at the wood top and call it a day. It will look cute. But if you want it to look like it was installed by a carpenter, you have to add molding. Let me tell you, this single step is responsible for 80% of the “wow” factor in the photos.
Go to your local hardware store and find “shoe molding” or “quarter round.” You want a thin piece of flexible wood. Nail it along the seam where the window sill meets the unit. Also, consider adding a piece along the top of the Nordli boxes, right under the wood top. This hides any unevenness and gives it that built-in vibe.
### Paint, Hardware, and Making it Your Own
I painted the Nordli frames to match my wall color. Honestly, this is a personal choice. I think white looks incredibly clean and beachy. But my living room has a lot of beige, so painting them a warm greige made them disappear against the wall. That makes the window seat look even more substantial.
Swap out the standard Nordli knobs for something prettier. It is a 5-minute job and it completely changes the look. I used matte black handles that are slightly longer than the originals. It adds a bit of modern flair. And while you are doing that, let the drawer boxes air out. They have a slight factory smell that fades after a few days, but taking them outside for a bit helps speed up the process, especially if you are putting linens in there.
The cushion is the final element. I had a 3-inch thick foam pad cut to size and bought some outdoor fabric to sew a simple cover. Outdoor canvas is good because it doesn’t slide around as much and it handles sunlight without fading. I just wrapped the foam in the fabric and tucked the edges under, no sewing required, though a staple gun into a thin plywood base works better if you have the tools. My neighbor’s dog barked for a solid week at me while I was doing the final assembly, but the result was worth it.
### The Budget Recount
Alright, let’s talk money. A lot of blogs say “cheap” and then hit you with a $600 total. Here is the real math for my project:
– Nordli chests: $180 total (on sale, roughly)
– Solid pine top: $40
– Molding and paint supplies: $25
– Foam and fabric for cushion: $40
– Knobs: $15
That puts you at around $300. That is still a fraction of a custom built-in cost, which would easily run you over a thousand bucks.
The best part is that you are getting actual storage. These drawers are deep enough for throw blankets, board games, or even out-of-season clothes. The Nordli drawers are heavy-duty too, they handle weight without warping. This project gives you seating, storage, and a little spot to drink your coffee in the morning. It is a big win for a small budget, and honestly, it’s a fun weekend project that you will actually show off to your friends.
If you’ve been on the fence about doing an IKEA hack like this, just go for it. Measure your space twice, grab the tools, and give it a go. You’ll be surprised at how professional it looks when you step back. Save this one for later, you are going to want to build it.
Leave a Comment