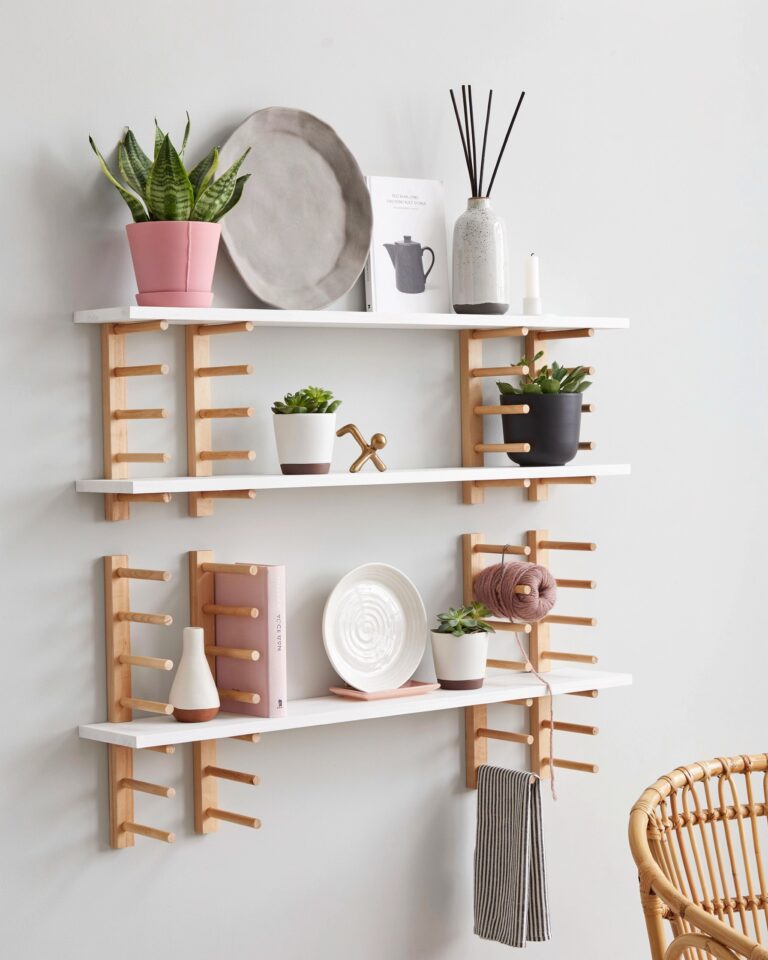
When I first spotted the IKEA OSTBIT plate rack, I saw more than just a way to organize dinner plates. The wooden slats and angled design looked like they could become something better with a little creativity. That is how I discovered the IKEA OSTBIT shelf hack: a simple way to turn a five dollar kitchen organizer into custom wall shelving that fits any room. I mounted a few on my rental kitchen wall, and they instantly gave me flexible storage without drilling into tile or spending a fortune. If you have been searching for a budget friendly project that actually works, this one is worth your time.
Why the IKEA OSTBIT Plate Rack is a Hidden Gem for Wall Storage
The OSTBIT is sold as a plate rack, meant to sit inside a cabinet and hold dinner plates upright. But look at it sideways, and you will notice the deep ledge and two metal crossbars that make it perfect for mounting. The rack is made of solid bamboo, which is lighter than solid wood but still sturdy enough for books, jars, or small plants. At around $5 each, you can buy several without feeling guilty. I picked up four of them on a whim, and they have become my favorite wall storage solution for the hallway and bathroom.
What really sold me was the built in lip. That front edge keeps items from sliding off, which is rare in most DIY shelf options. The rack also comes with small keyhole brackets on the back, though I found those a bit flimsy. I replaced them with simple L brackets for a stronger hold.
How to Plan Your Custom Wall Shelving Layout on a Budget
Before you start drilling, think about where you want the shelves and how they will look together. I laid mine out on the floor first, arranging them in a staggered grid pattern. You can line them up horizontally for a continuous ledge or stack them vertically like a small bookcase. The beauty of this hack is that you can change the spacing later if you want, since each rack is separate.
For a floor to ceiling feature wall, I recommend spacing the racks about 12 to 18 inches apart vertically. That gives enough room for taller items like cookbooks or vases. If you are working with a narrow wall, a single row of three racks looks clean and intentional. Measure your wall and mark the studs before you buy brackets. This keeps the project simple and avoids wall damage.
- Tools you will need: power drill, level, measuring tape, screwdriver, L brackets or heavy duty picture hangers, drywall anchors (if no stud), pencil.
- Estimated cost per rack: $5 for the OSTBIT, $2 for hardware. Total under $10 per shelf.
- Time per rack: About 20 minutes including marking and mounting. A full wall of four racks takes under two hours.
Simple Steps to Mount OSTBIT Racks as Budget Friendly Shelves
First, remove the tiny plastic bumpers on the back of each rack. They are meant for cabinet use, but they get in the way when mounting. Next, attach your chosen hardware. I used simple L brackets that I screwed into the bamboo from underneath. Make sure the screws are short enough that they do not poke through the top surface. If you want a cleaner look, you can drill pilot holes and use wood screws directly into the wall studs through the existing keyhole slots.
Hold the rack against the wall and use a level to check alignment. Mark the screw locations through the bracket holes. If you are not hitting a stud, use drywall anchors rated for at least 15 pounds per rack. The bamboo itself is light, but once you load it with books or decor, the weight adds up. I hung my racks in a stud where possible, and they have held up perfectly for over a year with no sagging.
Tips for Styling Your New Wall Storage for Small Spaces
These shelves work best when you mix function and display. In my kitchen, I use one rack for spices and another for coffee mugs. In the hallway, I store keys, mail, and a small photo frame. Because the OSTBIT has a natural wood tone, it pairs well with white walls and green plants. Try adding small baskets or jars to keep smaller items from rolling off the ledge.
For a rental, these shelves are ideal because you only need a few screw holes per rack. When you move out, patching them is quick. I avoided heavy adhesives or command strips because the bamboo is too smooth for adhesive to hold long term. Screws are the only reliable method, and they leave small holes that are easy to fill.
A Few Lessons I Learned from This DIY Shelving Project
My first attempt was too low. I hung the rack at eye level, forgetting that the lip takes up some height. Now I place them a few inches higher than I think I need, especially when storing tall spice jars. Another lesson: do not overload
#IKEAhack #DIYshelving #budgetdecor #wallstorage #homesolutions
Leave a Comment