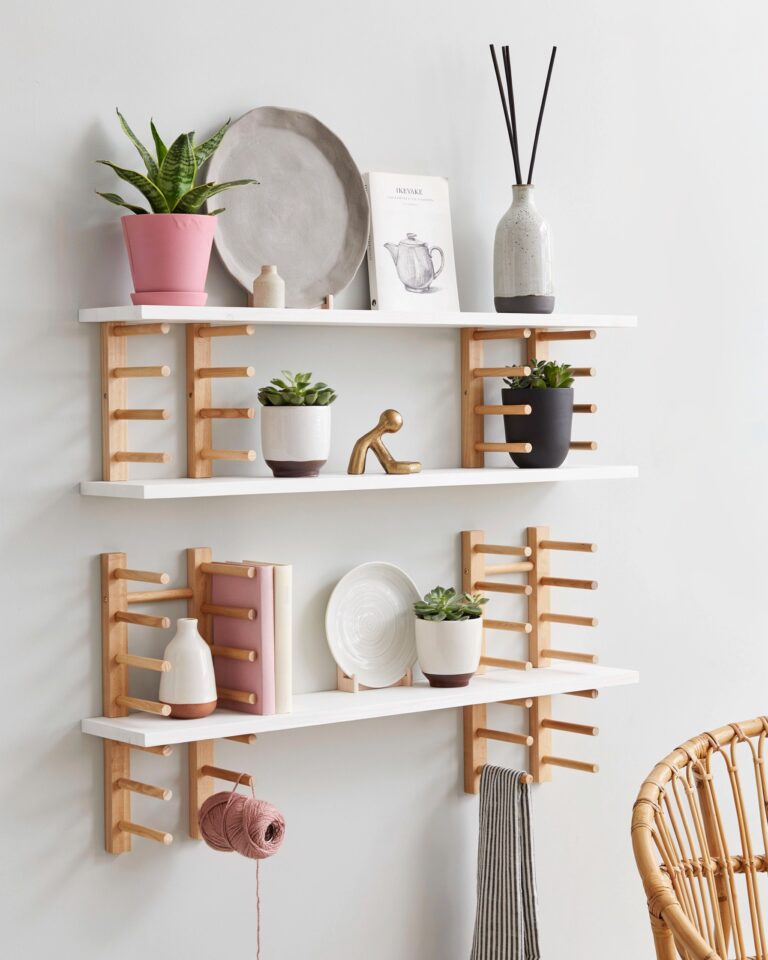
IKEA shelf hacks don't have to be complicated. This simple DIY uses basic OSTBIT wood plate racks mounted on the wall to create customizable shelving that looks high-end for a fraction of the price. Perfect for adding storage to small spaces without breaking the bank. Try it yourself and see the difference. Here are nine ways to turn those cheap racks into something you'll actually want to show off.
1. Floating corner shelf with OSTBIT racks
Small corners often become dead space. Mount two OSTBIT racks at a 90 degree angle in a corner, then place a slim wooden board across both. You get a floating corner shelf without any complex cutting or brackets. I used a piece of pine board from the scrap bin and stained it dark walnut. The whole thing cost under $5 and holds my coffee mugs perfectly. Just make sure the racks are level with each other before you screw them in.
This works best in a kitchen or bathroom where you need extra storage but don't want bulky furniture. Add small hooks underneath the board for hanging keys or dish towels. The racks themselves are sturdy enough to hold a few pounds, so keep heavier items on the bottom shelf if you stack multiple boards.
2. Two tier spice rack from one OSTBIT rack
Standard spice jars waste vertical space. Take a single OSTBIT rack and flip it upside down so the lip faces upward. Mount it directly on the wall inside a cabinet door or on an empty stretch of backsplash. The rack becomes a shallow shelf that holds spice bottles perfectly. To add a second tier, screw a narrow wooden dowel or a small metal rod about two inches above the rack. Rest a second row of bottles on the rod. It sounds odd but it works, and you can see every label at a glance.
I did this in my rental kitchen where I cannot drill into tile. I mounted the rack onto the side of a cabinet using command strips, and it has held up for six months. No holes and no damage. The total cost was the rack itself plus a $1 dowel from the craft store.
3. Vertical book ledge for small apartments
Books stacked flat look messy. Use three or four OSTBIT racks mounted vertically in a row to create a staggered bookshelf. Place each rack at a different height so you can lean books against the wall and rest them on the rack edge. The angle of the rack keeps books from sliding off. This is my favorite solution for a narrow hallway wall where a regular bookshelf would block walking space.
You can paint the racks to match your wall color so they disappear, leaving only the books visible. I left mine white against a pale gray wall and it looks like floating book ledges. Each rack holds about five paperbacks. If you want heavier hardcovers, screw the racks into wall studs or use heavy duty drywall anchors. Don't trust the little plastic anchors that come with the rack.
- Tip: Use the rack's natural curve to hold open books for display. Place a cookbook or art book on the rack and let the pages rest against the wall.
- Tip: For a kid's room, mount the racks low and let children change out their favorite picture books every week.
4. Bathroom towel shelf with warm wood
Most bathroom shelving is either too bulky or too cheap looking. An OSTBIT rack mounted horizontally makes a perfect small towel shelf. The rack's wide base holds folded hand towels or a rolled bath towel. I added a thin bamboo board on top of the rack to create a flat surface for a soap dispenser and a small plant. The bamboo contrasts nicely with the white rack. It took me ten minutes to drill the rack into the wall above the toilet.
If your bathroom has high humidity, seal the wood board with a clear polyurethane spray. The racks themselves are solid beech wood and handle moisture fine as long as they aren't submerged. I have one directly next to the shower and after two years it still looks new.
5. Entryway catch all station
Keys, mail, and sunglasses clutter up every entry. Mount two OSTBIT racks side by side about four feet apart. Place a long wooden board across both to make a slim console shelf. Below the shelf, add a row of small hooks on the wall for coats and bags. The shelf holds a tray for keys, a small bowl for spare change, and a framed photo. The racks cost less than $10 total and the board was a leftover piece of shelving.
To give it a more finished look, I rounded the edges of the board with sandpaper and applied a clear matte finish. The whole thing sits in a 24 inch wide hallway and doesn't feel cramped. You can also use the rack itself to hold a small plant or a framed picture if you don't want to add a board. The rack's lip keeps items from sliding off.
6. Kitchen mug display with extra storage
Mugs take up too much cabinet space. Use OSTBIT racks as individual mug shelves. Mount one rack high on the wall and place a mug upside down so the handle hooks over the rack lip. The rack holds one mug per slot, or you can fit two smaller mugs side by side. I mounted a row of three racks above my coffee station. It frees up a whole cabinet shelf and makes my morning coffee routine feel like a cafe.
#IKEAshelfhacks #IKEAhacks #DIYshelving #budgetdecor #discounthome
Leave a Comment